New York-Style Instant Pot Cheesecake
This post may contain affiliate links. Please check our privacy and disclosure policy.
Learn how to make New York-Style Cheesecake — in the instant pot! This cheesecake recipe is so much simpler than the oven version!
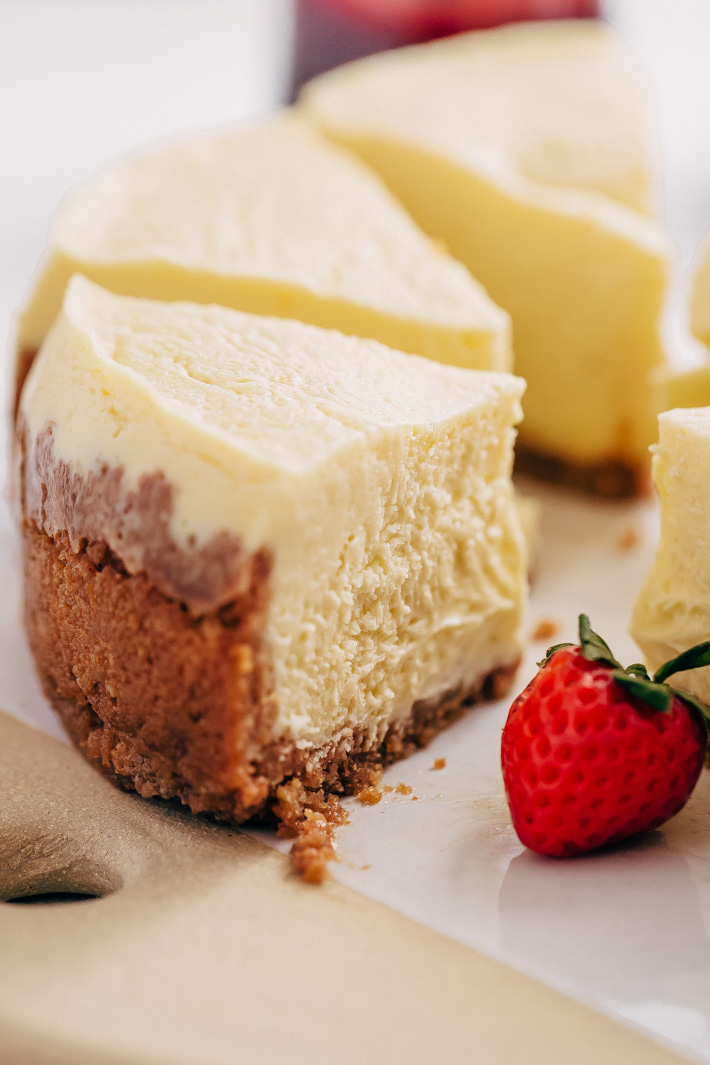
You’ve officially seen it all.
Cheesecake made in the instant pot.
There’s a sentence I never thought I’d say. But not only is instant pot cheesecake easy to make; it’s just as good as it’s oven counterpart. It starts with a buttery graham cracker crust and is topped with a velvety smooth cream cheese mixture and then pressure cooked for a little less than an hour. It’s also a manageable 6-inch cheesecake so you can make it for dinner parties or during the holidays when you’re trying to stretch the dessert table a little more and don’t want to have TONS of cheesecake around after.
Side note: who are those people that don’t want to have cheesecake around? I’m one of them!
In the name of recipe testing, I have gone through many, many slices.
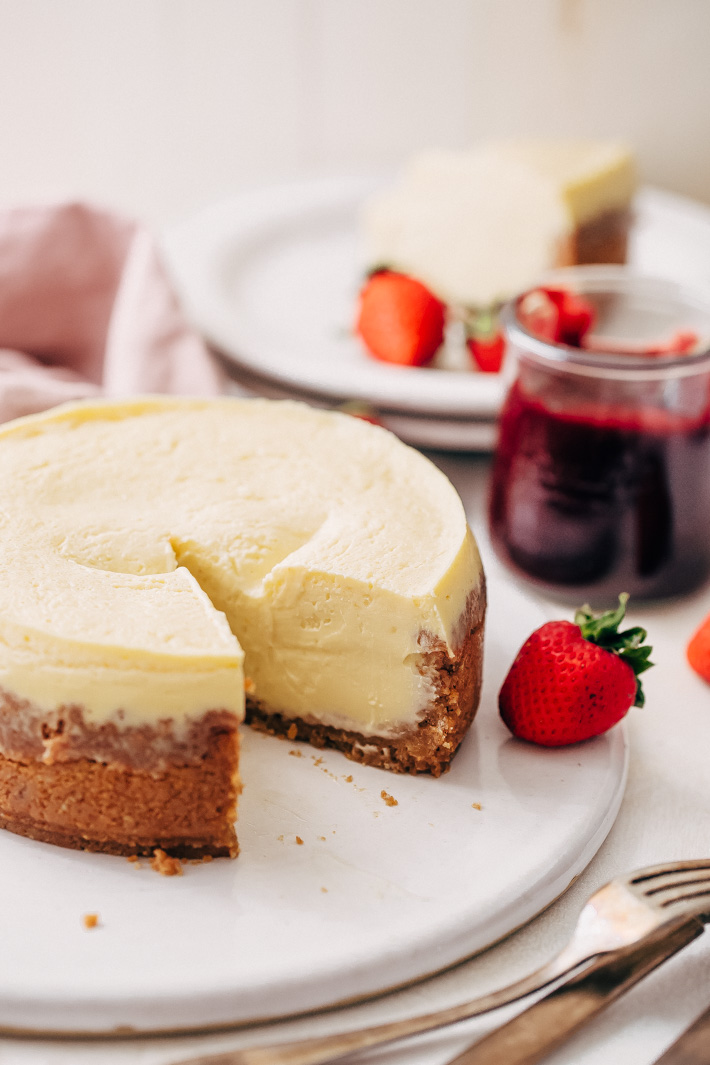
I have to tell you, the last time I made cheesecake before this instant pot version, was when I was in my third year of college, years ago. I was so traumatized by the experience; it took me a whole ten years to recoup. It was a Sunday afternoon, I had invited a few close friends over for lunch, and I thought cheesecake would make the perfect dessert after a light meal.
To skip ahead: the cheesecake was delicious; the crust was an entirely different story. I baked the crust as the recipe stated. The cheesecake mixture was creamy and tangy. I even decided I’d bake it in a water bath to ensure a crack-free cheesecake. But what I didn’t anticipate is that the water bath would end up doing more harm than good. You see, in my naivety, I poured the water so far up the sides that it ended up getting inside the foil wrapping. That first bite was nothing but a soggy-bottom, mouthful of mush.
Making instant pot cheesecake means there’s no need for a hot water bath or squatting every twenty minutes next to the oven to make sure your beloved cheesecake isn’t going to have cracks. Both of which I’ve been tortured with before. None of that nonsense when you’re making cheesecake in the pressure cooker.
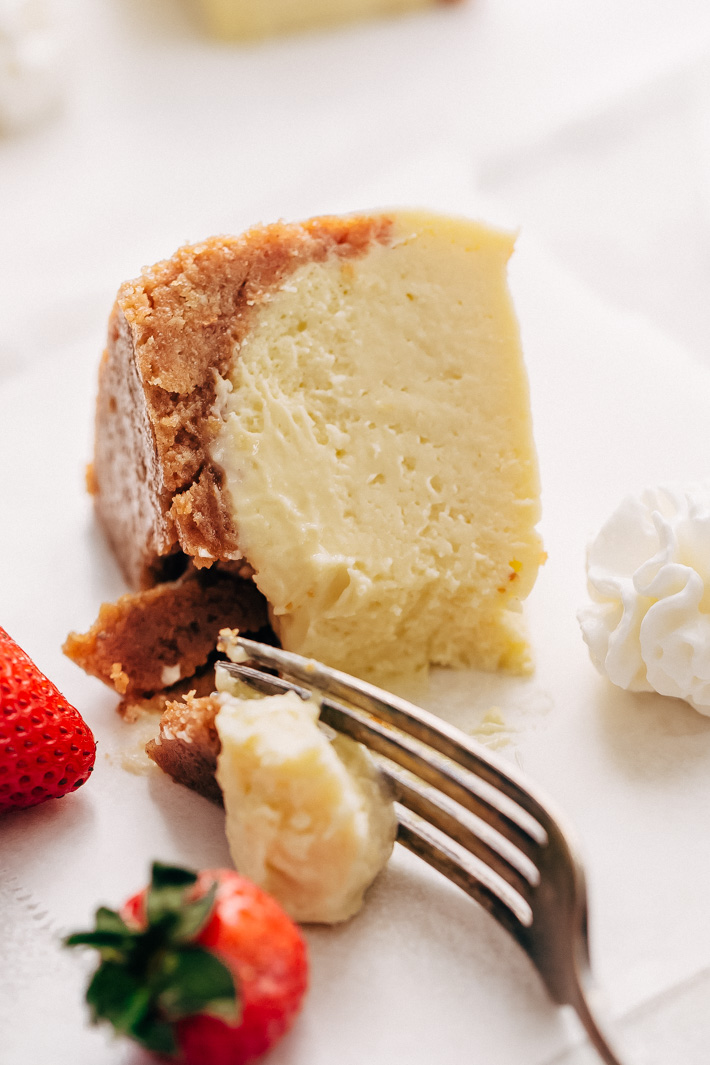
To be honest with you, I never thought I’d be making anything sweet in the instant pot (affiliate link). Chicken broth? Yes. Soups? Definitely. Rice? That’s a given. But dessert? Um.. really?
The first time I made cheesecake in the instant pot, I learned a valuable lesson that I’m going to pass on to you. If you’re like me and use a ton of garlic or onions in your instant pot recipes, do yourself a favor, and buy an extra sealing ring (affiliate link) before you attempt to make this cheesecake. You can tell if you need a new sealing ring if when you lift the lid of your IP, the smell of ____ (insert last meal cooked in instant pot) starts invading your nostrils. The first time I made instant pot cheesecake, I almost died, because the top layer smelled// tasted// emitted smells of garlicky beef soup. I’m all for beef soup and cheesecake – just not together on the same plate, please and thank you!
So please, whatever you do consider ordering a new seal before you serve this cheesecake to loved ones, it’s quite a mortifying experience. One that almost had me halting my cheesecake making for yet another decade.
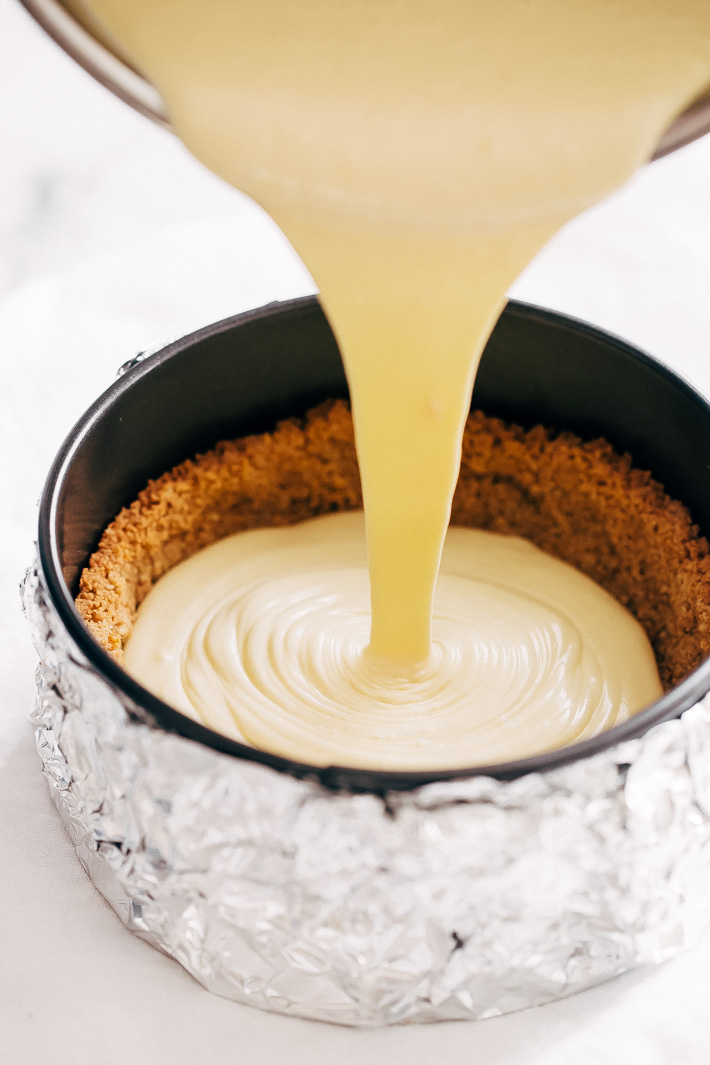
Tips on perfecting instant pot cheesecake:
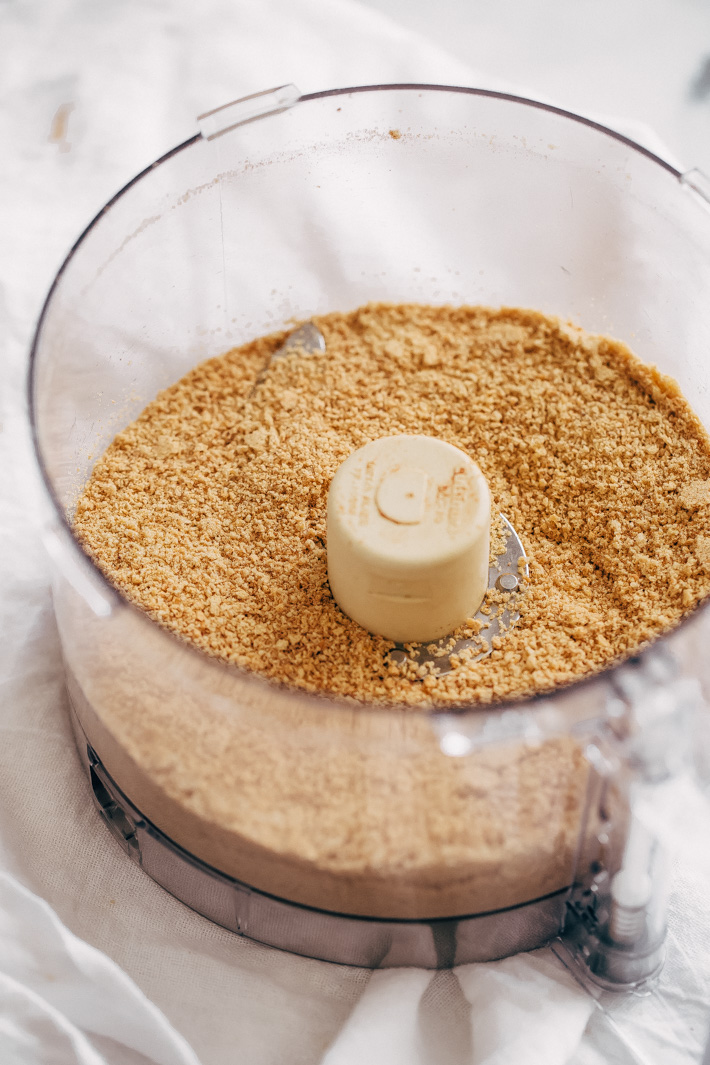
- Crust: I’m using the crust I always use for my Key Lime Pie Bars. You’ll need graham cracker, pecans, sugar, butter, and cinnamon. Once you’ve made the crust, you can either bake it for 10 minutes or pop it in the freezer for 20.
- To ensure your cheesecake is crack-free: plan ahead. Sorry folks, no manual pressure release on this one! Seriously; don’t do it. After playing around with this recipe tons, I have to tell you, you’ve gotta let the pressure cooker naturally release its pretty to ensure that the cheesecake stays crack-free and cooks all the way through.
- Make ahead: my two favorite words around Thanksgiving! I like to make this cheesecake 24-48 hours ahead and guess what? Cheesecake tastes better as it rests; win-win. So make it today, or tommorow if you’re planning on serving this for T-Day.
- Use a smaller springform pan: This recipe will work with both a 6-inch (affiliate link) or 7-inch springform pan (affiliate link). You’ll also need the steamer rack (affiliate link) that came with your IP. We’ll add water to the base and then place the rack on top to pressure cook the cheesecake.
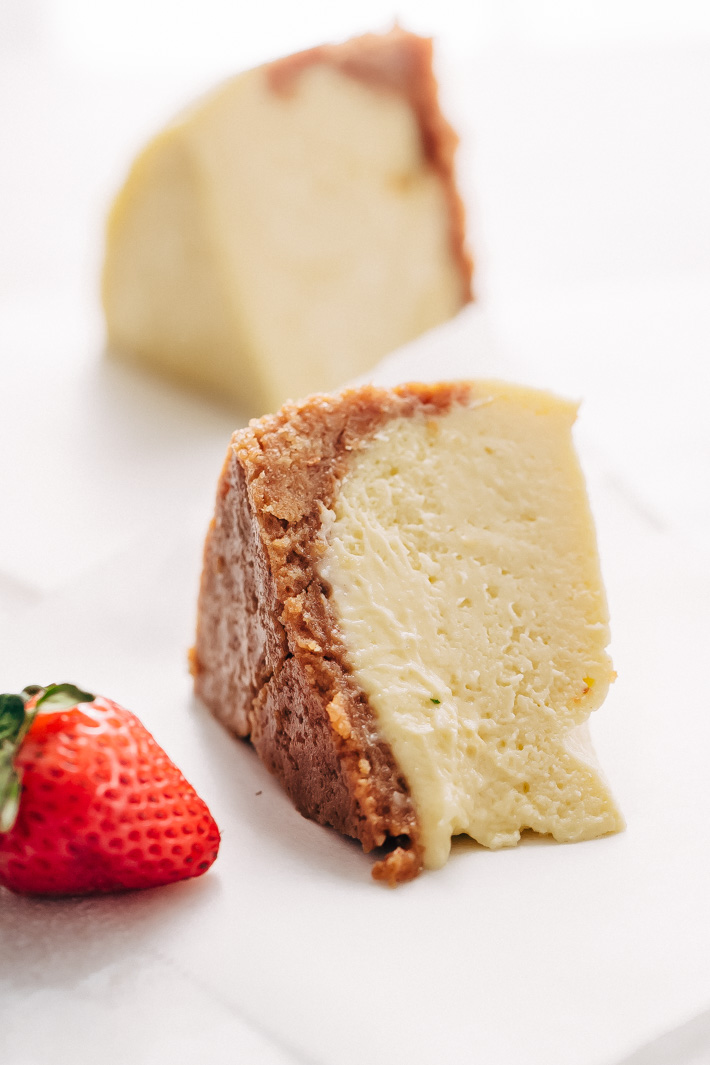
Dear Cheesecake Lovers: How about this year we make instant pot cheesecake and leave the oven to things like turkey//stuffing// rolls// pies and everything else that requires the ovens attention during the holidays?
I’m keeping it ultra classy with my New York-Style Cheesecake right here.
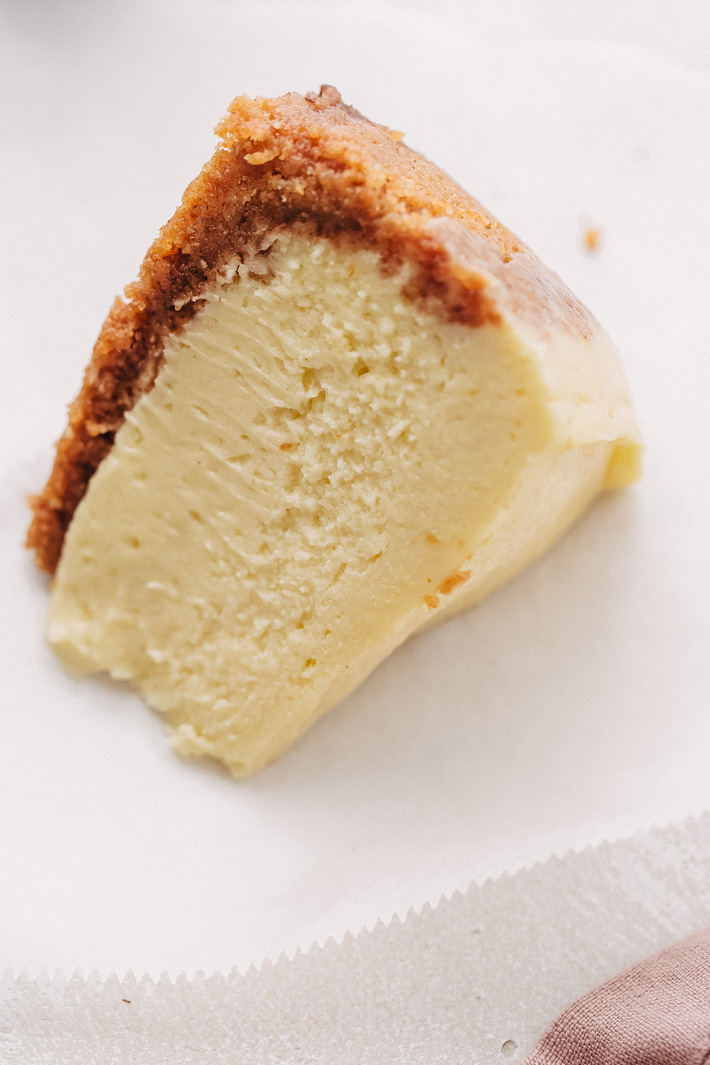
New York-Style Instant Pot Cheesecake

Ingredients
Graham cracker crust:
- 3 tablespoons sugar
- 5 tablespoons butter
- 9 large graham crackers, pulsed into crumbs
- 2 tablespoons ground pecans
- 1/4 teaspoon cinnamon
Cheesecake filling:
- 12 ounces cream cheese (or 1 1/2 packages)
- 1/4 teaspoon kosher salt
- 2 teaspoons lemon zest
- 2 teaspoons vanilla extract
- 1 tablespoon cornstarch
- 1/2 cup + 2 tablespoons granulated sugar
- 2 large eggs + 1 egg yolk
- 1/2 cup sour cream
Instructions
- Position a rack in the center of the oven and preheat the oven to 350ºF if you plan on baking the crust. If you're freezing it, you can skip this step. Regardless of which method you use, wrap your 6 or 7-inch springform pan tightly in foil and spray the inside of the pan with non-stick cooking spray.
- crust: combine the butter and sugar in a microwave-safe bowl and zap until the butter melts, about 30-40 seconds. In a medium bowl, combine the cracker crumbs, pecans, and cinnamon. Pour the melted butter on top and using a rubber spatula mix until the crumbs are covered in the butter. Press the crumb mixture into the bottom of the prepared pan and about 1-inch up the sides. Place the pan in the freezer for 15-20 minutes or bake for 10 minutes. If baking, allow the crust to cool to room temperature before proceeding.
- cheesecake filling: In the bowl of a stand mixer fitted with the paddle attachment, beat the cream cheese, salt, vanilla, lemon zest, and cornstarch until smooth, about 1-2 minutes. Add the sugar and let it mix in completely before adding the eggs one at a time. Add the sour cream and mix until just combined. Pour the batter into the crust. Cover the top of the springform pan with a piece of foil and wrap it tightly around the rim.
- pressure cook: Pour 1 1/4 cups of water into the base of the instant pot and place the steaming rack on the bottom. Place the springform pan on the rack. Lock the lid in place and seal the vent. Cook the cheesecake on manual high pressure for 37 minutes and allow the Instant Pot to naturally release its pressure for 25 minutes afterward (the 'keep warm' setting should still be on, you don't want to turn your IP off completely).
- let cool: carefully remove the springform pan from the IP then remove the foil. Using a piece of kitchen towel, gently wipe the surface of the cheesecake if there is any moisture on the surface of the cake. Allow the cheesecake to cool to room temperature, about 3 hours before placing it in the refrigerator to cool overnight. Cheesecake can be prepared 24-48 hours in advance. Top with whipped cream, berries, or apple or cherry pie filling before serving!
Notes
- 9 graham cracker sheets is roughly 1- 1 1/4 cups of crumbs.
Update (1/30/2018): A few readers have mentioned the cheesecake didn't set for them in the middle as it did for me in the time noted. For this reason, I'll be retesting the recipe. This recipe was tested multiple times and my cheesecake was perfectly set in the time noted. In the meantime, a helpful reader suggested to help the cheesecake set, you can wrap it in plastic wrap and freeze it overnight. This seems to help solidify the center a bit more. You can also check the cheesecake once the pressure releases and if it is still pudding-like in the center, you can continue to pressure cook it for an additional 5-10 minutes (depending on how puddingy it is) then natural pressure release with the 'keep warm' setting on.
SaveSave
SaveSave
We are a participant in both the RewardStyle and Amazon Services LLC Associates Program, which are affiliate advertising programs designed to provide a means for sites to earn advertising fees by advertising and linking to amazon.com and through RewardStyle.


57 Comments on “New York-Style Instant Pot Cheesecake”
This is only the second thing l’ve tried to cook in my instapot copy so, first of all thank you so much for all the (very) helpful hints. I made mine in a stainless steel pudding bowl cos it was all I had that would fit. We’re in lockdown here so buying something to size wasn’t an option. Used the juice from 1/2 the lemon instead of vanilla essence and Greek yogurt instead of sour cream for the same reasons also, left the cinnamon out cos l forgot to add it to the crust before l pressed it. Didn’t change anything else and followed instructions and times as written. IT IS FANTASTIC. The flavour and texture are perfect. I had enough left to make 4 mini cheesecakes in ramekins to freeze for later. Cooked them for 10 minutes but think 8 may have been better. l’m grinning as l write this though, cos the odds of any of them lasting the night let alone getting frozen, are fairly slim. It really is THAT good. Thanks again.
How much is 9 graham equal to? Lazy here bought the crumbs.
I believe the problem is the foil. I haven’t made your recipe per se, but I do make Instant Pot cheesecakes every week. When I first started using my IP to make cheesecakes, I used the wrapped foil method. My cheesecakes were never done—sometimes cooking them three times before they would partially set. Then I started not using any foil at all, just a piece of round parchment paper laid loosely over the top to catch condensation. They have turned out perfectly every time with the suggested pressure and release times in the recipes I’ve used.
Hmm.. that’s really interesting. I can see how the foil could be an issue. Thank you for sharing!
Trying this, thank you!
I’ve made this recipe several times always with foil as directed. When it’s done the center looks a bit loose but once cooled it totally sets up. Excellent flavor.
I made this recipe twice and it came out perfectly delicious, but the 3rd time it puffed up like a soufflé and didn’t cook through. I researched and determined that perhaps I over-mixed it, so I tried again and although my 4th try didn’t puff up, it still didn’t cook through. I followed the directions to the letter adding 11 minutes to the cooking time with a natural release of 25 minutes. The only difference between my successful attempts and unsuccessful attempts is that I used the original base pot the first 2 times and a coated dark pan the second 2 times. Any ideas what I’m doing wrong?
Hmm, I think the coated dark pan may indeed be the culprit. I know that when you’re baking in a regular sheet pan vs. a darker pan, it does significantly change the baking. However, I usually find that darker pans take less time to cook so this stumps me. I’ve never made the cheesecake in anything but the original base pot, so I really feel that may indeed be the issue.
Thanks for getting back to me so quickly. I’ll try again using the original pot and let you know. When it came out correctly, it was the best cheesecake ever, on par with bakery cheesecakes and Ina Garten’s famous recipe!
This was the best cheese cake I’ve ever made. Easy , delicious and just the right size. The only thing I did differently is cook it for 48 min as recommended by others. Perfect!
I love this cheesecake! It was my very first cheesecake in the instant pot so I was very nervous about it actually turning out. The recipe was easy to follow! I ended up doing a 50 minute cook time and the 25 min NPR. I let it set in the fridge overnight, I added peaches on top and it was perfect! Thank you for sharing your recipe!♡
Oh, dear. No IP. Your recipe looks delicious. Any advise for time and temp in the oven? I realize most requests are for the opposite conversion 🙂 Thanks.!
Hello, made this on Tuesday and I thought it was pretty good. Then I tried it after 24h in the refrigerator and it was fantastic! I did leave it too cook for 48min and had no problems. I was wondering if you have another cheesecake recipe coming, any different flavors? Can I put 2 cheesecakes in one pressure cooker? Thank you for this wonderful recipe.
I did add 15 minutes to the cooking time after reading the previous comments. It turned out AMAZING!!!! This was also my first time to make REAL cheesecake. Saving the recipe. Will definitely make again and again.
What a hit! I did have to cook an extra 10 minutes!
New Instant pot, third recipe tried, (first cake recipe) followed exactly as written … Outstanding. Rich and so creamy with a crunchy crust and gentle hint of lemon. Looked terrific, tasted better. Couldn’t wait and wife and I waited until completely cool and cut 2 small slivers. Her grin was bigger then mine. Couldn’t believe it the next day after refrigeration. Ambrosia!
Followed recipe instructions exactly, with exception of adding the two extra T. of sugar. At altitude of 3,600 ft., it came out perfectly. The only reason for decreased the sugar was taking into account the sugar in blueberry topping.
I have made this recipe several times and it is absolutely delicious! I am one of those who had problems with my cheesecake being undercooked. I have had better luck with not covering it with foil. It comes out perfect every time. But that’s just what seems to work for me.
Thanks for sharing your tip, Brandon!
I just made this for the first time – at really high altitude (over 10,000 ft). I may have misunderstood the recipe and lined the pan with foil, INSTEAD of covering the outside. It came out perfect with no time or recipe adjustments. I’ve never made cheesecake before, but will definitely use this recipe regularly in the future.
I made this and the center was too liquidy so I added 10 minutes and it looks great! I didn’t add nuts or cinnamon. I also used lemon juice instead of the zest 1tsp. I made it in the Ninja Foodi! We’ll see how it tastes tomorrow! Thanks for the recipe and the update!
I have made this recipe a few times and it’s delicious however I live at high altitude (7200 ft) and have found that I need a longer cook time by at least a few minutes. At least 40 minutes cook time, full natural release, let it rest, and then refrigerate overnight and it works for me. Delicious!
I made this last evening in my 10 quart Fagor Lux. I did 37 min, but it was liquidy in the center. So I put back for 12 more minutes. Next time I will do 50 min. I used a 6 inch springform pan.
Loved the cheesecake and found the recipe and process easy to follow. Next time I’ll go for a slightly longer cook time although the 37 minute product was acceptably firm. Made it for a desert to bring to a chili cook off competition and it disappeared quickly!
Made this for a work birthday party and it was a huge hit. Even the usually aloof/ reluctant complimenters were going crazy for it! I didn’t have any issues with it setting up and I’m kind of glad I didn’t see your note about retesting the recipe until after I had committed to it and started working. That being said, I use an 8 inch spring form in an 8 qt Instant Pot so the fact that the filling is not as high in my pan may have worked in my favor. The consistency was spot-on and the flavor divine. I love your pecan graham crust using the blind bake option. This is a keeper, worth using valuable printer ink! 🙂
I made this for my husband. I couldn’t believe how easy it was. He says it’s really good. Now I have no excuse not to make him cheesecake more often.
Your recipe says to cover the Top of the pan tightly with foil before putting in IP. When I removed the foil some of the cheesecake filling stuck to it. Did I do something wrong? Otherwise it turned out great.
Trish
Hi Trish! Mine probably just didn’t come up as high as yours did in your pan, which is why the foil got stuck. For next time, I suggest maybe not using the last little bit of filling (leave off a couple of tablespoons or so) or leaving a little bit of extra foil at the top, but still crimping the sides so it’s on tight (I hope that makes sense!) Hope you and everyone you share the cheesecake with, enjoys it thoroughly!
Do you think this would work using lower fat cream cheese or neufchatel cheese?
TIA
Sheila
Hi Sheila, not sure about using low-fat cream cheese for this recipe, if you decide to use it though, I’d love to know how it went!
What a perfect recipe! I added on 3 minutes, cooked for 40 then let it sit with the warm function for 25 minutes before opening. It was well set so I feel the 37 minutes would have been enough. I used an 8 inch pan that fits in my duo8 pot. Topped with crushed fresh raspberries, so good! I ill be looking for your pumpkin cheesecake recipe next! 🙂
This recipe was perfect. I read recipe wrong and used 1 and 3/4 packages of cream cheese. I didn’t use a mixer when adding the eggs. Gave room temp eggs a whisk to just blend well in a separate bowl and folded them in. I have a 6 qt instant pot and used a 6 inch pan. I also used a paper towel to gently tilt the cheesecake to sop up excess water build up after it cooled. No cracks. No need for an instant read thermometer like when baked in a regular oven. The flavor and texture are outstanding. This is the prefect size for a small family. I have made cheesecakes in a regular over and always let them rest for an hour in the oven with heat off. So I did the same thing in instant pot. I let it sit in the pot for an hour in depressurization mode with pressure lid on when it was done. Then removed from the pot to finish cooling on the counter.
I chose your recipe because of the ingredients listing sour cream and cornstarch. Other recipes I reviewed listed heavy cream and flour. Seemed like poor choices for an athentic tasting cheesecake to me.
Hi!
I tried the recipe exactly as written and mine came out a little too jiggly in the middle. I touched the top lightly and got a finger full of filling lol. So I just put it back in for another 10 minutes so hopefully that will work. If not then I will adjust accordingly next time. I have an 8qt and used a 7” pan. I’m just at sea level so I shouldn’t have had to adjust the time. Either way, I’ll toss it in the freezer once it comes to room temp and see how that works out. Thanks for posting the recipe because even if it doesn’t work this time…the cheesecake filling itself is delish and if I can’t get it to work in the IP then next time I’ll just use the recipe and bake it the old fashioned way ??
I made this in a 6″ springform pan in a 6Qt IP and it came out very watery. So I turned on the oven 350 F and popped it in for 20 min. I cooked it later at night and didn’t feel like waiting the 3H to get to room T so I let it cool a bit and then set it outside to cool overnight. I cut a piece this morning and it is perfect. This is a really delicious recipe and I will make it again. Im wondering if the cook time should be longer in the IP since it is a thicker cake due the smaller pan. What do you think? (I love your website and I plan to check out more recipes)
Can I use a regular Croc Pot? Not pressure Croc Pot
This recipe hasn’t been tested in a crockpot so I’m unsure if it’ll work, sorry!
My first attempt at this recipe resulted in a very runny center; so, I popped it back into the IP for a further 10 minutes of pressure cooking + 25 minutes natural pressure release. I should have known at the outset to have added the extra time, as I live at a higher altitude (Calgary, Alberta, Canada…about 3,500ft above sea level)
Ive certainly have had my issues with the last nights dinner smell left on the IP seal. Ugh!! I found if you put the IP together, use the steam function for 10mins with the the vinegar/water/lemon slices recipe it works great. Just do a search, think its on the IP site. I let mine air dry overnight hanging somewhere so it fully airs out. Also can soak it in vinegar & hot water overnight if its a stubborn smell. Cant wait to try this recipe!
Thanks for the tip, Lisa!
Great recipe. Just removed springform from instant pot (6qt)
Used coconut sugar vs cane sugar
Used lowfat yogurt vs sour cream
Cooked perfectly.
Now watch TV for 3hrs before placing in fridge
Should have read all directions because it’s 1am!
I painstakingly followed your instructions and made this today for the first time on my 55-year-old man and I’m like a 16-year-old that just got a new toy. I enjoyed making it with my hands in my IP. I could not wait until tomorrow to taste it and it is splendid and firm in the middle thank you. Thank you for sharing
Absolutley amazing! And i have never made a cheesecake before. I will make this many more times!
If you are cooking at a higher elevation it can effect cooking times. I live at 4000ft so added 3 min of cooking time and it came out perfect. I had never made cheesecake before. This is a great recipe as is or can be used as a base for different flavours.
Worth mentioning that some 8-inch pans will fit into a 6 qt Instant Pot
The “bottoming chiffon cake pan” at Miniso just fits my 6qt Instant Pot Ultra, and I’ve never had a failure when making cakes in it.
Is your instant pot a 6 or 8 at?
Having hard time finding 7” pan
I have a 6 quart. I’ve linked to the 7 inch pan that I purchased off of Amazon in the post, if you’re interested!
Any suggestions doing this in an 8 quart IP with a 7 inch pan?
Thanks
THANKYOU for this recipe! It turned out perfectly.
I read the reviews before making so I changed only one thing – I “baked” it for 40 mins instead of 37 minutes.
I used a 7″ Springform pan.
Honestly – it turned out SO well I will just stick with this cheesecake recipe from now on.
Thanks so much for taking the time to share this recipe!! I really appreciate it!!
I made this cheesecake for my husbands birthday and it came out perfect! I’ve never made a cheesecake in my entire life and followed the directions exactly. I recommend it!!!
Here I am one year later and making it again for my hubby’s birthday! It’s so easy (which is critical with a baby and a toddler)! Thank you for this recipe…again!
I made this cheesecake yesterday and it was so good. I had no problems with it “setting”. It tastes much better after it has refrigerated overnight. Followed the directions exactly. Thank you so much for sharing this recipe.
I made this cheesecake in my instant Pot with a 6″ springform pan and also noted the slightly pudding like consistency in the center even after cooling and refrigeration. My husband and I each ate a slice and it was delicious. I wrapped the remainder of the cheesecake in plastic wrap and placed it in the freezer overnight. Perfect. You can cut through it even frozen and I just make sure to take it out of the freezer before the meal and slice what I will need and let the slices thaw slightly. It is the same consistency as any cheesecake I have eaten at a restaurant. I washed the silicone sealer and wiped it with lemon juice prior to baking the cheesecake. This took away the “fragrance” from the previous meal I made, which used onion soup mix.
Hi Sue, thank you so much for your feedback and for the helpful tips. That freezer trick is pure genius! I’ll add a note to increase the pressure cooking time while I retest this recipe to see if the timing varies widely between batches or if it varies from IP to IP. 🙂
This recipe looks fabulous; the recipes to make a cheesecake in our new instant pot was one of the things I was most surprised to discover. But as a cheesecake is one of my favorite sweet treats, I’m excited to try it.
I am curious, we have the smaller IP (3 quart), so would you make any adjustments in terms of how much water you put in the pan or any other “major” changes? (And of course, I’m already planning to use a smaller springform pan.
Thanks for sharing the recipe!
Hi there! I’m happy to hear you’d like to give this recipe a try! A few of readers have mentioned that the cheesecake didn’t set for them in the time noted. Since you’re planning on making this in a smaller instant pot (using a smaller springform) I think this would certainly increase the time as you’ll have a much thicker crust and cream cheese layer. Unfortunately, I can’t say with certainty how much longer it’ll need but I’d allow extra pressure cooking for sure. In terms of water, you want to make sure the water level is just below your trivet so that it doesn’t come up to where the springform pan sits 🙂
Made this in a 6″ springform in my 6 quart Instant Pot. Even after refrigerating overnight and into the following evening, the center was not fully set; not quite soupy, but a sort of puddinglike consistency. Might require a slightly longer bake time; or, when you let the IP slowly depressurize after cooking, did you keep it in ‘keep warm’ mode, or turn the heating element off? I did the latter, so that may have deprived the cheesecake of a little extra necessary cooking heat/time.
Nonetheless, was very delicious, and I’m excited to experiment with other cheesecakes now that I have a proof of concept. Thanks for that!
Hi Stacey, I’m glad to hear you gave the cheesecake recipe a try! Once the cheesecake was cooked, I didn’t touch the IP and just let it naturally release its pressure for 25 minutes. I’ll clarify a bit more in the directions to let it sit on the ‘keep warm’ setting as mine does that automatically. Thank you so much for your feedback!
Were your ingredients room temperature or straight from the refrigerator? I’ve always been taught that everything should be room temperature and am thinking if the ingredients were cold perhaps that is the reason it didn’t quite set in the middle. If so, give it a go with room temperature ingredients and see if that makes the difference.